Before I became obsessed with stamping and paper crafting, my biggest passion was gardening. I've always loved old wooden garden trugs or caddies and decided I needed to make one of my own. Except, of course, I would be using paper and dies!
As you've seen from some of my past projects, I love building things with Eileen Hull's ScoreBoards dies. This is a project I've been thinking about for a long time and decided that
this month's Red, White, and Beautiful theme for Eileen's Art With Heart Challenge was the perfect excuse to play around with the caddy idea. Read on to see how you can make one of your own.
Begin by cutting the box pieces from medium weight chipboard using Eileen's 3D Block die - you'll need two panels per box. Cut off one section from half of the die cut panels (that's the lid and we won't need it). Apply ScorTape to the tabs.
Assemble all the boxes as shown.
Glue the boxes together in sets of three. I like to make sure all the tabs are facing the same direction. Don't glue the sets together yet - we still need to make the handle!
To create the handle, first cut a 9 1/2" x 6" piece of chipboard.
Measure up from the bottom and make a mark at 3 1/8" on either side of the chipboard. Measure in from the left side and make a mark at 3 1/4" and at 6 1/4". Draw a line connecting the dots and cut along the line, removing the corners.
To create a handle opening, find the center of the upper portion of the handle. With the Sizzix Base Tray under the chipboard, line up Tim Holtz's Mini Label Movers and Shapers die in the desired location and tape down. This is the opposite way you normally use the M & S dies, but you need to be able to see where you're cutting. Cut the handle opening with your die cutting machine.
NOTE: I've had a few comments saying that I must have a bigger die cutting machine or wondering how this fit through my Vagabond. It looks really wide in this photo, but if you cut the piece as I have -
6" high, and align the die at the top of the base tray as shown - it will fit fine! No special machine is needed. Your Vagabond or Big Shot will both work!
Now that the handle is finished, you can adhere the box sets to either side of it.
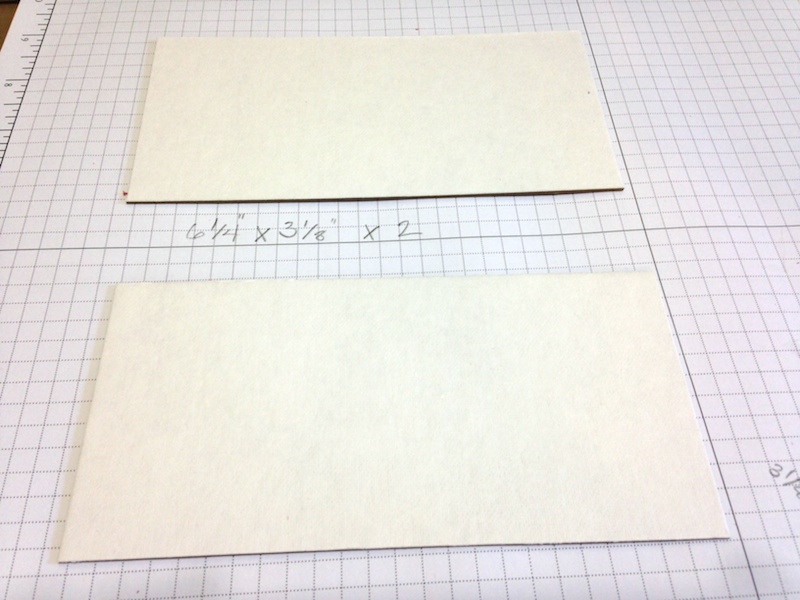
To hide the seams, cut two chipboard panels at 6 1/4" x 3 1/8". These will be the end pieces.
Cut two more pieces, this time measuring 9 5/8" x 3 1/8". These will be the front and back pieces.
Adhere the chipboard panels. It's starting to look pretty cool - right?!
Next, paint the entire caddy with red craft paint. Let dry completely.
I wanted to have a vintage looking label painted on my caddy, but I was scared that I'd mess it up by trying to stamp with paint. A good compromise is embossing! Stamp your image (this is from
Oxford Impressions' French Script collection) onto the caddy using clear embossing ink and cover with Seafoam White embossing powder. Heat to melt. Note: if I'd been thinking ahead, I would have done this step before gluing the panel down!
To give the caddy a realistic wood look, sand all the edges and sponge with brown ink.
I had some little square peat pots that fit perfectly into the openings. Small canning jars also fit well. Since this is paper, it shouldn't be in contact with any moisture, but you could certainly have plants in a jar that you remove to water.
And think of all the other uses for this cool little caddy. It would be great in your craft room holding supplies, or in the bathroom keeping your makeup organized. I think it would look adorable in the kitchen holding tea or spices too. I hope you decide to make one!
The supplies I used can be found at Sizzix, Simon Says Stamp, and Amazon via the links below.
Thanks so much for stopping by today!