Showing posts with label Valentines Day. Show all posts

Tuesday, February 12, 2019

Basket Full of Love

Hi all! I have a sweet Valentine's Day pop-up card to share with you today. Originally it was supposed to be for this month's Designer Challenge, but I was on vacation and totally lost track of time, and forgot to post it! The beach tends to have that effect on me, what can I say?!

I am absolutely in love with Karen Burniston's new Woven Basket die - it's such a cool take on the pop-up box card. I decided to make my husband a somewhat masculine feeling Valentine's card, using the heart dies from Karen's new Heart Pivot Panels die and stamps from Tim Holtz. All the elements are attached to the card using strips of clear transparency.

I love that this folds completely flat for mailing. What a fun treat to send someone! And the possibilities are endless. You could style this in a cute, spring theme; shabby chic; holiday; etc. Oooh, and imagine it filled with some Graphic 45 fussing cutting!! It's really so versatile. I can't wait to play more with this die!

You can find the dies I used via the links below.


Thanks so much for stopping by today - have a great week!!

Tuesday, February 14, 2017

Shake it Up! Valentine's Shaker Card


Happy Valentine's Day, everyone! Since my last post with Karen Burniston's Designer Challenge team, we've regrouped as a casual group of crafty friends called Paper Pros and are participating in a monthly, no-stress challenge. I'm so excited that the team is still together and happy to get to work with such a talented group of friends!

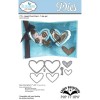
This month our challenge is Shake it Up. We all created cards with either a shaker or some other type of movement. I'm still on my addiction to shakers, so I used Karen's Hearts Pivot die to created a three panel card using some pretty papers from Prima. You might remember I used this fabulous technique from Summer Hills-Painter a couple years ago, but with the Butterfly Pivot. I love that it looks so complicated, but is really quite easy!


I created the shaker portion by using the two smaller heart dies to cut two layers from fun foam. I adhered them, then covered the top with a clear piece of acetate cut from the larger heart die. The final layer was another frame, this time cut from pretty paper. I added dots of Platinum Stickles to decorate the edges. I filled the heart with pearl beads and sequins, then glued a backing on.

Here are links to the other Paper Pros.
Caz Counsell - Valentines treat boxes with wobbling critters
Fran Sabad - beach-themed shaker card
Karen Aicken - pop-up Valentine with shaker balloon
Sandy Diller - accordion Valentine with wobbling bear
Frances Byrne - pop-up Lorna label window shaker card
Donna Wright - http://oldredshed.blogspot.com
Summer - Hills Painter - http://1craftypainter.blogspot.com
Raquel Mason - http://raquelmason.blogspot.com
Helen Cryer - http://diningroomdrawers.blogspot.com
Kelly Booth - http://cruzinkellster.blogspot.com


Thanks so much for stopping by today! You can find the supplies I used at Elizabeth Craft Designs and Simon Says Stamp via the links below. The Heart Pivot die is on sale right now for just $12.95, so grab it while you can!


Sunday, February 12, 2017

Galentines Day Brunch


Hi all! This weekend, I had my girlfriends over for a 'Galentines' brunch and thought I'd share some pics of my party table. I love having them over - it's always so much fun! - and I love creating special treats for them. This little cloche and stand was made with Eileen Hull's Cupcake Stand die and a dollar store plastic wine glass. So cute!

You know you love your friends when you break out your favorite retired Graphic 45 paper. This is Gilded Lily and I cry a little every time I use it! I used it to cover the cupcake stands and also as place cards. I cut stands for them using Tim Holtz's easel die.

I love when my friends and I get together - it's a great time to break out the vintage silver and glassware. Some of it gifts from them, which makes our get togethers that much more special. The white plates are from Ikea, the pink tumblers are from the Dollar Tree - everything else is vintage and most likely came from a thrift store or estate sale.


Yum! The food is always the highlight! Most of the recipes were found on Pinterest. I love the ombre look of the strawberry bellinis. The tiny pitchers were something my husband found at Home Goods. It's nice to have a husband that gets excited about mini pitchers of syrup! I just had to find a reason to use them for the party.

I knew that bagels and lox were one of my friend, Cyndi's, favorites, so I made sure to include a bagel bar in the menu. They were so good!

I saw this heart shaped citrus salad on Pinterest and fell in love. :) So pretty and was a nice contrast to the more rich dishes.

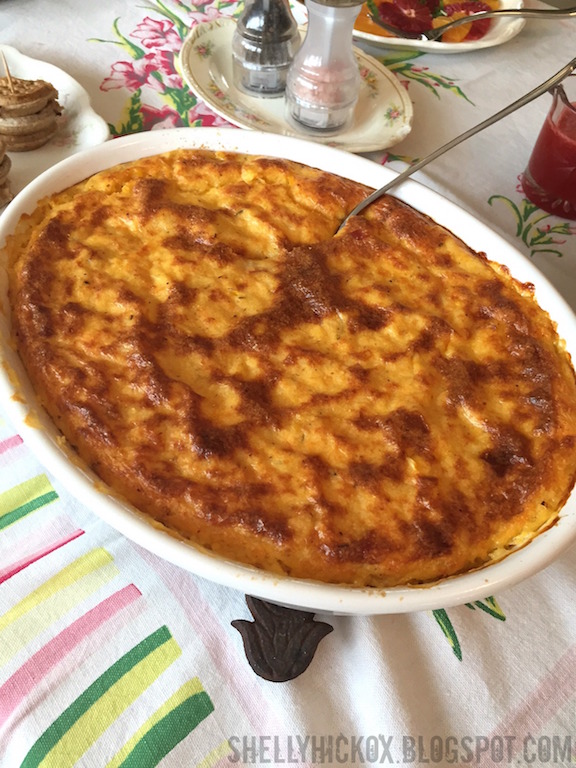
Speaking of rich! I saw this cheesy grits casserole in a recent issue of Southern Living and knew I had to make it. It is SO good! I am not a native Southerner, but I'm falling in love with grits lately. My husband usually turns his nose up at them but devoured the leftovers today!

If you follow me on Instagram, you might have seen that I recently tried making French macarons for the first time. I was so happy with how they turned out! My friend, Michelle, recommended a book she'd received as a gift and I ordered it right away. I can't wait to try more recipes.


Speaking of Michelle, she was kind enough to share some of her photos with me. I love this one of the flowers I did. Just basic pink and white carnations with baby's breath, but I love how sweet they look - and they always remind me of high school dances when you'd get corsages. Do kids even do that anymore?  I found the glass hobnail jars at Target's dollar spot and thought they made perfect vases.

Finally, what's a party without cake?! I know that my friend, Becky, would be brokenhearted if I didn't include one! I've listed the menu below, along with links to the recipes.


Menu
Mini Waffle Stacks
Bagel Bar
Strawberry Bellinis


I hope you enjoyed a peek at my party and my sweet macaron cloche made with Eileen Hull's Cupcake Stand die. It's on sale right now at Sizzix, so it's a great time to pick on up! There are so many ways to use it. Speaking of sales, Sizzix is also having a huge sale on Tim Holtz dies. The sale ends today, so grab a few while they're at great prices!


The supplies I used can be found at Sizzix, Simon Says Stamp, Elizabeth Craft Designs, and Amazon via the links below.


Thanks so much for stopping by today!

Monday, February 15, 2016

Art With Heart Challenge - Clean and Simple

Hi all! Today I'm sharing a project for this month's Art with Heart Challenge from Eileen Hull. This past weekend, I hosted a fun 'Galentines' Day party for a few of my close friends. I love the idea of celebrating our friendship and I'm never one to pass up the opportunity to drink champagne and eat cake!

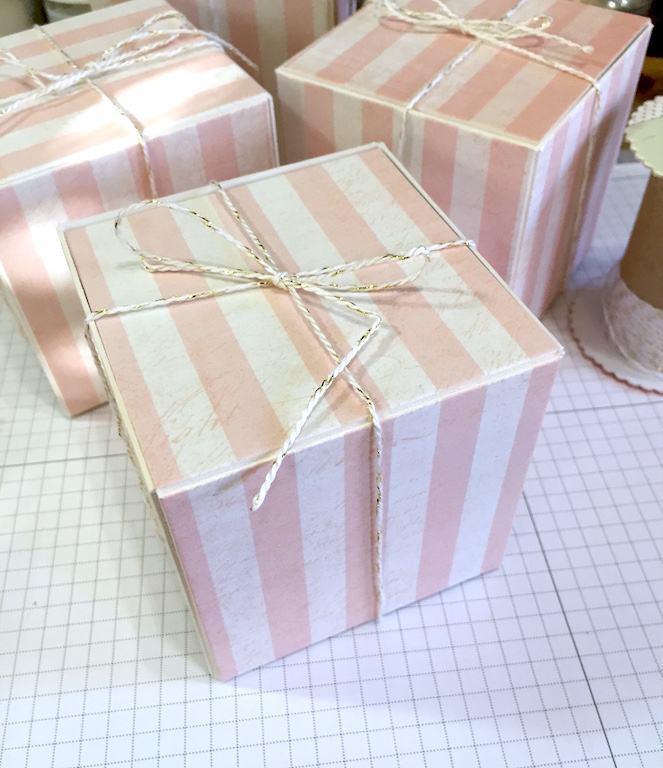
For February's challenge, Eileen wanted us to create something clean and simple - a project that can be completed in 10 minutes or less. This is usually a very tough thing for me, but I knew that Eileen's Square Box die would be perfect for creating some super simple, yet eye-catching, favors for my table. And, with so much party prep to do, it was nice to be able to create something so sweet in such a short time. I filled them with nail polish and pedi tools and tied them with a simple gold-threaded white baker's twine.

There's nothing like having an excuse to pull out the vintage linens, pink Depression glass, and buy a bottle of bubbly, right? I found pretty matching pink glasses, as well as inexpensive champagne flutes, at The Dollar Tree. The gorgeous flowers are from The Bouqs.

I found this adorable cake stand in the Target Dollar Spot a few months ago and have been dying to make a mini cake to set it on. While I was looking around for cake recipes, I came across one for champagne cake and adapted it a bit. I baked a white cake using Wilton's 5-piece cake pan set to bake thin layers. I filled the inside with this Easy Bavarian Cream. Yum! The frosting is buttercream. The rosettes are so easy to make - you can find tons of tutorials on Pinterest.

Here's a (very!) quick look at how the boxes came together.

Begin by covering white mat board with pretty paper - this pink and cream striped paper is from My Mind's Eye. Cut two box panels, making sure you reverse the direction of the stripes on the second panel. If you don't you'll have one set of stripes going horizontally.

Assemble the boxes, fill with treats, and tie with twine. So easy!

My sweet friend, Becky, always makes me pose with my table. :) Champagne, flowers, and lots of pressies - nothing beats a good, girly party!

The supplies I used can be found at Sizzix, Amazon, and Simon Says Stamp via the links below.


Thanks so much for stopping by today - have a great week!

Tuesday, February 9, 2016

Karen Burniston Designer Challenge - Glitter!

Hi everyone! It's time once again for Karen Burniston's Designer Challenge and I'm sharing what might just be one of my all-time favorite cards. Our challenge was to use glitter in our creations. Well, you know I love my glitter - I couldn't wait to get started! With Valentine's Day just a few days away, I decided to create a sweet, glittery Valentine card using a few of my favorite Pop it Ups dies.

I told Karen I had been waiting for her to come out with a balloon die just so I could do this technique with it! I love this honeycomb look (you might remember my honeycomb hot air balloons from a few years ago) and I think it's so perfect with this shape. All I did was cut multiple balloon sections using the new Hot Air Balloon die, folded them, then attached them to each other. To create the trim, I cut the scalloped border twice and glued it together to create a piece long enough to wrap around. I did the same thing with the top edge of the balloon basket. So sweet!

The card was created using the Accordion Rectangle die - one of my faves. I cut it from sturdy grey cardstock and then cut it again from this pretty paper from My Mind's Eye. After trimming off the interior panels from the MME paper, and trimming a bit off the edges, I adhered it to the grey card base, creating an easy border. The right side of the panel was created with the frame die from Karen's Katie Label Pivot set and the letters were cut from glitter paper with Elizabeth Craft Designs' Alpha 1 die. I created a charm by cutting more glitter paper with the heart from the new Hanging Charm Pull Tab die set.

Since I added the scallop trim around the balloon, this card can't be mailed flat, but would have to be put into a larger envelope or box, or hand delivered. If you wanted to be able to mail it in a normal envelope, you could leave off the trim and press the folds down. The recipient could fluff it up when they received it.

You can find the supplies I used from Elizabeth Craft Designs, Simon Says Stamp, and Amazon via the links below.


Make sure you check out Karen's blog tomorrow for a fantastic new tutorial and tons of glittery inspiration from the rest of the Designer Challenge team!

Monday, January 18, 2016

Karen Burniston Designer Challenge - New!

Hi all! It's time again for Karen Burniston's Designer Challenge. The theme this month is 'New'. Anything goes as long as we use at least one of the dies from Karen's new collection. Since I'm just a bit obsessed with the Hanging Charm Pull Tab die, I decided to give it a steampunk look and create a Valentine's Day card for my husband.

Oh, if you've never seen this die, I'll bet you didn't see that coming!! How insane is that?! When you pull the tab, it pops up the frame and reveals a message hidden underneath. How perfect is it for a mechanical, interactive steampunk card? I love love love this die!

A few quick details on how I made my card. The bottom layer is painted corrugated cardboard. Next, I cut a panel from a cereal box (cheap chipboard!) and painted it with Brushed Pewter Distress paint, then stamped it with a number stamp and jet black ink. The next layer is more chipboard, this time painted with Tarnished Brass Distress paint. Oh, and prior to painting it I dabbed some DecoArt Media Texture Sand Paste here and there. The rivets are the waste from the center of Karen Burniston's large gear die.

The pull tab mechanism was cut from cardstock, dabbed with sand texture, then painted with DecoArt Payne's Grey and English Red Oxide to give it the look of rust. After making this, I would recommend avoiding any part of the mechanism where the texture would cause it to snag (I scraped a lot of it off!). The heart charm (included in the die set) was cut from chipboard and painted with DecoArt Crackle Paste. After it dried, I adhered numbers that were die cut from black cardstock using Karen's clock die, then covered the whole thing with DecoArt Liquid Glass, to give it the look of enamel.

The frame was cut from cardstock using a rectangle frame from the Flourish Gift Frame set, and the medium-sized oval from the Accordion Oval die set. I love being able to mix and match these dies to get the perfect look. I trimmed down the frame a bit to get it to fit, then embossed it with a gear stamp from Artistic Outpost, and painted over it with more Payne's Gray, wiping off the excess. Finally, I added embellishments from Tim Holtz and a stamped sentiment and I was done!

I didn't have my husband to act as my trusty cameraman today, but I managed to take a quick video to show you how the pull tab works. Seriously, it's so cool - you need this die! Check out this video from Karen that shows how easy it is to use this die.

The dies I used can be found at Elizabeth Craft Designs via the links below, the rest of the supplies I used can be found at Simon Says Stamp and Amazon.


Thanks so much for stopping by today and for all the lovely comments you've been leaving on my CHA posts. I'll have another designer challenge project to share tomorrow, so be sure and check back!

I'm also submitting this to the latest SanDee and Amelie's Steampunk Challenges - my first time!