Showing posts with label Mother's Day. Show all posts

Tuesday, May 1, 2018

Karen Burniston Designer Challenge - Paradise


Hi all! I'm back today to share the card I created for this month's Karen Burniston Designer Challenge. For May the theme was 'Paradise'. If you know me, that can only mean one thing - my garden! I decided to create a Mother's Day card for my mom using Karen's Flower Pot Pop-Up die set and some pretty papers from an older Prima collection.

How amazing is that pop-up?! I used Karen's idea of making a terra cotta pot using Tim Holtz's Distress Oxide inks. I posted her video at the end of this post so you can see how it was done. I added water droplets on mine to give it a bit of an oxidized look.

I really wanted layered, colorful flowers, but I was too lazy to ink up a bunch of paper and then cut the flowers. Instead, I cut them from various papers from the Prima pad and then layered them. I cut the butterflies from glitter paper and adhered them with thin strips of acetate.

I had tons of flowers left over, so I filled the front of the card with them. The woman is a photo realistic rubber stamp from Oxford Impressions - one of my all-time faves! I stamped the image on glossy paper and colored it with distress markers.

Here's a little video of the card opening. It's so amazing that the whole thing folds down so perfectly!


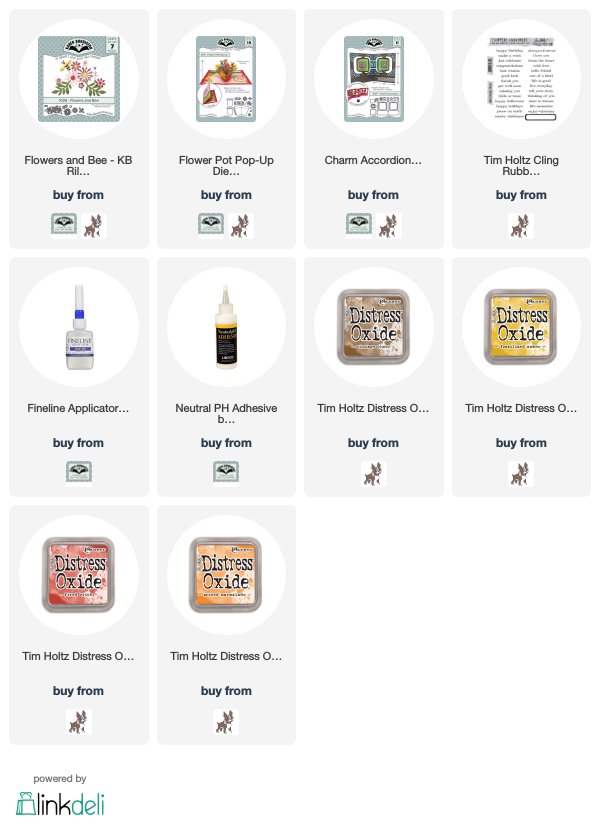
You can find the supplies I used via the links below.

Thanks so much for stopping by today. Be sure and check out Karen's blog tomorrow for lots of gorgeous Paradise cards and a new video from Karen.


Tuesday, December 16, 2014

Karen Burniston Designer Challenge - May

I am beyond excited to share today's card with you! It's my second card for Karen Burniston's Designer Challenge. This time my month is May so I thought I'd do a pretty Mother's Day card with another one of my favorite Graphic 45 collections - Botanical Tea. What makes this card so special?

It's a tunnel card! Or a double concertina, or double accordion tunnel card. Take your pick! Last month I saw this card on Pinterest. My first thought was that there had to be a way to make one with one of Karen's accordion dies. But try as I might, I couldn't figure out how to make it work. I asked Karen if she had any idea how I could do it and, within minutes, she had a mock up and basic instructions! That woman works fast.

When I was trying to decide what kind of card to make for the challenge, I thought I would be brave and try what looks like an incredibly complicated card technique. You know what I found out? It's super easy. Like, crazy, super easy. Here's how I made it:

Begin by cutting an 8.5" x 11" piece of paper in half lengthwise. Fold each piece and die cut using Karen's Accordion Oval die. Be sure you drop the fold down below the cutting edge so that the fold remains intact. Cut out the center portion as shown on the bottom piece.

Next, cut notches on the inside of the oval on one piece, and on the outside of the other. Stamp with desired images.

Line your card sections up facing each other, with the fold facing out. Gently fold the left section of the piece with the top notches and pass it through the oval opening, lining the notches up. If the fit is too tight, remove and snip out a bit more paper until they fit.

Repeat the process for the other section. You've just made your tunnel accordion. I told you it was crazy easy!

This is the direction you'll be working in when you decorate your card. I recommend decorating your card after it's assembled, other than stamping or a bit of paper layering. You definitely need to be able to have everything lined up when you're planning out your paper placement.

I had a blast snipping and gluing and pop-dotting all the the gorgeous images from this Graphic 45 collection. It's truly hard to know when to stop! I used Karen's House Pivot Card die to make a little fence, and the banner from her Lorna Label set to create a sentiment.

One thing about a card like this - still photos don't come close to showing the dimension. Here's a quick little video to give you a better idea of how this card operates.

The best part about this card is that if folds completely flat for mailing. I couldn't control myself and went outside the margins with some of my flowers, but if you keep it all within the edges of the card, you can just pop it in an envelope and send it on its way!

The supplies I used for my card can be found at Inspiration Emporium and Elizabeth Craft Designs via the links below. Remember to use my coupon code - stamptramp - to save 10% on your order!


Thanks so much for stopping by today. Be sure and head over to the Elizabeth Craft Designs blog tomorrow for a new video from Karen (I've seen it and you don't want to miss it!), plus incredible cards from the team for every month of the year!

Tuesday, April 15, 2014

Pop it Ups April Challenge - Mother's Day

Hello everyone! Today I'm sharing a card I made for this month's Karen Burniston Designer Challenge. This month we could choose between Mother's Day and baby themes and the DC team totally outdid themselves! Make sure you check out Karen's post on the Elizabeth Crafts blog to get a full dose of inspiration.

I chose to make a Mother's Day card for my mom, figuring I'd be ahead of the game when it rolls around next month! I used the Katie Label Pivot die and some of my favorite paper from My Mind's Eye. The card base is kraft paper that I first embossed with Karen's new Damask embossing folder. After I embossed the front, I experimented with highlighting the embossing with white paint...which didn't really go as planned, so I painted it all white and then sanded it off to show the embossing. On the bottom, I added a panel of paper and a border cut using one of the edge dies from Karen's Agatha Edges set.

Here is the card when open - so pretty! The Katie Label die is the perfect pop-up for any type of card. It comes with SO many extras so you can decorate to your heart's content.

Another thing that I love about these pivot dies is the outside decoration is also the inside - that saves time for sure! For this panel, I used one of the matching label dies to cut a piece of decorative paper slightly smaller than the pop-up. On top of that, I used another of the dies that has an embossing feature to create the green label. I highlighted the raised portion with white embossing powder. Finally, I added a die cut butterfly from the Butterfly Accessories set along with the filigree butterfly.

On this side, I repeated the same steps, but added a vellum panel with my greeting. Since I didn't have a Mother's Day stamp (out of the 1000s of stamps I own!) I printed it out and then immediately covered the wet ink with silver embossing powder. That's a trick from the olden days of stamping for sure. ;)

BRILLIANT BURNISTON DESIGN TRICK ALERT! A few weeks ago I was struggling with trying to adhere an intricate die cut onto a card. I got gooey adhesive everywhere and almost ruined my card. While whining to Karen about it she said, 'just run your cardstock through the Xyron, die cut your piece, and then peel the backing off and stick it down.' Brilliant! After die cutting the flourishes above (also from the Agatha Edges) and trying unsuccessfully to get glue on them without making a mess, I remembered Karen's tip. I tried it and my life has been changed! I defy you to find one tiny bit of residue on that flourish. Brilliant, I tell you!

As always, I love including a little Vine video to show the card opening and closing. It really shows how cool the pop-up is as well as all the other details that get lost in a picture.

You can find most everything I used to make my card at Inspiration Emporium via the links below. Remember to use my coupon code - stamptramp - to save 10% on your order! You might also notice that there are two links for the Karen Burniston dies. I've also included a link to Elizabeth Crafts, just in case IE happens to be out of the dies I've used. Please note that you cannot use the 10% discount code there, but it will give you another opportunity to pick up these great dies.


Thursday, May 2, 2013

Sizzix Pop 'n Cuts Mother's Day Card

Today I have a tutorial on the Sizzix blog featuring LOTS of fun techniques. I had a blast playing around with Tim Holtz' new Distress Paints, a few new dies, and alcohol ink. I can't decide which of the elements is my favorite - the Distress-painted flowers? The embossed metal frame aged with alcohol inks? Or that shabby Distress-painted Ornate Frame? I so love experimenting with my Sizzix dies!

I also jumped at the chance to use Karen Burniston's new Ornate Edge Square Pop 'n Cuts die, which should be shipping very soon. I love that it makes it so easy to create a side-opening card like this, and that edge - so pretty!

Speaking of pretty, how sweet is that photo stamp? It's been ages since I used my photo realistic rubber stamps from Oxford Impressions and I have to say, I've really missed using them. This is the first time I've tried stamping them onto the new(ish) Ranger Specialty Stamping Paper, and I am so happy with how crisp the image is - it will definitely be my go-to paper for this type of stamp from now on. (BTW, I apologize for the pixel-y look of this. Photo stamps are notoriously hard to photograph.)


The supplies I used can be found at Inspiration Emporium via the links below. Don't forget to use my coupon code - stamptramp - to save 10% off your order!


Make sure you come over to the Sizzix blog to see the full step-by-step tutorial. I'll show you how to create the die cut and embossed frame, the Distressed die cut fabric flowers, and the shabby Distress-painted frame. Then, we'll put it all together to create a special, one-of-a-kind Mother's Day card that any mom would treasure!