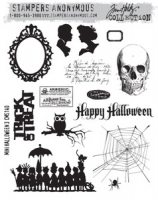
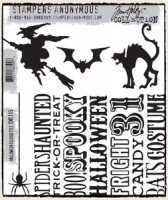
Showing posts with label Ranger. Show all posts

Sunday, May 20, 2018

Miniature Wardian Box

Hi all! I hope you're having a great weekend. Mine has been fabulous! I had my group of crafting buddies over on Saturday and we made these adorable Wardian cases. I had never heard of this term until my friend, Cyndi, introduced me to them. She has several in her home and, the last time I was there, I commented that we should make a miniature version out of chipboard. After opening my big mouth, I had to figure out exactly how this would happen. Time for some engineering!

After mulling it over a bit, I hit upon the idea of using Tim Holtz's Arch Movers and Shapers die to cut the openings in the walls, which were cut from medium weight chipboard. The front piece measures 6" x 5" and the sides are 3.5" x 5". The walls are hinged together with strips of cardstock.

I wanted my case to have the look of aged zinc so I gave all the chipboard pieces a coat of charcoal paint, then dry brushed it with white. I used Tim's Picket Fence Distress Spray to add drips of white. The fleur de lis is a Movers and Shapers die from Sizzix.

The case has a chipboard floor that was covered with foam that we painted green and then hot glued moss to cover.

Cyndi (who has more dies than anyone I know!), generously cut us every type of fern you can imagine. We inked them with Distress ink to add more interest and color variation.

All that's left is to glue all of the ferns in place!

I found some really cool acrylic panels on Amazon for the windows - they're so clear it really looks like glass! The adorable little gnome is from the Dollar Tree.

I added a few fussy cut butterflies from Graphic 45's Nature Sketchbook.

The trim was cut with an older die of Tim's called Vintage Lace. I can't find it on the Sizzix site so it must have been discontinued.

I love peeking through the windows at my adorable little gnome! It's just about the sweetest thing ever.

It's been ages since I've 'built' anything 3d and it was really a blast making these with my friends. I apologize for not sharing a better tutorial - it was totally a fly by the seat of my pants kind of thing! I hope you enjoy it as much as we did.

Sizzix has a big sale going on now and both of the dies I used are included! A word of warning - it looks like they no longer sell the base tray for using Movers and Shapers by themselves. If you don't already have one, there are lots of different tutorials for using them without the tray, though, so you should be able to Google it and find the correct sandwich for your machine.


You can find the supplies I used via the links below!

Thanks so much for stopping by. I hope you all have a fantastic week!

Tuesday, April 24, 2018

Pop-Up Steampunk Birthday Card

Hi everyone! I mentioned in my last post that, while I was working on the butterfly pop-up card, I had the idea to make a steampunk version...and here it is! My dad's birthday was last month but I was out of town and didn't have a chance to make a card for him. I thought the 'time flies' theme was perfect for a late birthday card!

Karen Burniston's Spinner Square Pop Up die is so much fun! I combined it with another one of her die sets - the Snowman Twist Circle - to create a spinning, moving card that is a delight to open. The base of the card is gray cardstock. On the front I added a silver painted and embossed panel and added a window. Surrounding the window is a gold (heat) embossed frame that I made by nesting the two largest circles together. The 76 was cut from foil-covered cardstock and colored with alcohol inks.

I thought that this sitting man from Tim Holtz's Paper Dolls was perfect sitting on/in the clock. When the card is opened, the gears spin out from behind the clock. It's so cool!

I used various gears from one of Karen's discontinued collections (Clock and Gears) and some of Tim Holtz's gear dies. The were all cut from heavy cardstock and given a metal look using my Faux Tarnished Silver technique - I haven't used that in ages!

Here's a closer look at the mechanism and gears. I used heavy clear plastic (cut from saved packaging) to create an arm that the gears could attach to. I had a hard time getting them to stay using any type of glue and ended up stapling them with Tim's Tiny Attacher. I decided it adds to the industrial look. ;-) The sentiment and words were computer generated and printed on kraft cardstock.


Here's quick video showing the mechanism operating. There are really so many possibilities with this die!!

Speaking of amazing dies, Karen Burniston/KB Riley are celebrating their new Facebook Group - Karen Burniston Pop-Up Peeps - with a sale! Through tomorrow, April 25th at Midnight CDT, they are offering 18% off of your order of $20 or more when you use the code 18OFF in the coupon box when you check out. This is a great time to stock up on some of the best dies the craft world has to offer!

You can find Karen's dies and the other supplies I used via the links below.


Below is the assembly video for the Spinner Square Pop-Up die. Once you figure out the mechanism, it's a breeze!


Thanks so much for stopping by today! If you're on Facebook, be sure and join the group. It's a fantastic, friendly group and people are sharing the most amazing cards!

Saturday, March 3, 2018

Shabby Floral Tent Card + a Tutorial!


Hi everyone! I'm back today with a pretty spring project using some of my favorite dies from Karen Burniston and Tim Holtz. Sizzix is having a huge sale this weekend and this Cabinet Card die is one of my favorites. I thought I'd experiment with a new way to use it - a tent card with a window that folds flat for mailing, but expands into a 3D scene. Cool, right?

I also wanted to experiment with making flowers using Distress Oxide ink and coffee filters. I used Karen Burniston's flower dies and I was absolutely thrilled with how they turned out! I took pics along the way to show how I made them (and the card). Read on to see how it all came together.

Begin by cutting the edges off of a cone-type coffee filter and separating the two pieces. Press Distress Oxide ink pad onto a nonstick craft sheet to dispense ink in a small area. Spritz the ink with water and lay the filter into it, spritzing with more water as necessary. Crumple the filter and wipe up all the ink. The filters are super absorbent and take the ink well.

Dry the filters with a heat gun. They'll be wrinkly, but will smooth out later. And don't worry about any texture that might be on the filter - it disappears after the flowers are cut.

 Stack two filters and cut several flowers, using dies from Karen Burniston's Flowers and Bee die set.

Without separating the flowers, stack a small flower on top of a larger flower, punch hole and insert stamens (you can find a tutorial for how I made my stamens in this post from a few years ago). Add a dab of glue to the back and cover with tiny flower. This will keep the stamens intact and hold the flower together. When dry, separate and fluff the petals, as you see in the flower on the right.

To create the tent card, cut a frame from a piece of heavy green cardstock using the small cabinet card die nested inside the larger one. Scrape DecoArt crackle paste over it and let dry. Meanwhile, cut a piece for the back of the card from the cabinet card die (remove the movers and shapers die). Add the decorative background piece (an ATC sized panel from Tim Holtz's Wallflower collection). Trim as needed. Cut a piece of kraft cardstock measuring 3 3/8" x 2" and score every half inch. Also cut a small piece from Kraft cardstock to use as a hinge for the top.

Adhere the accordion scored piece as shown above.


Adhere the paper dolls to the center accordion fold. Rub word band with white Distress crayon to highlight the words and attach to the bottom of the card. Attach the hinge at the top. Finally, add your flowers and leaves and a glittery swallow, cut from glitter paper using the bird die from Karen Burniston's Outdoor Scene set.

How pretty are these flowers?! I just love the softness of the filters and the bold color from the Distress Oxide ink. And they look quite a bit like my inspiration - the forsythia bush in my yard that's blooming like crazy right now.

In My Garden is the theme over at the Simon Says Stamp Monday challenge blog this week, and I just happened to take this picture this morning, which inspired my whole card!

Here you can see that this folds completely flat for mailing. How sweet would this be for a birthday card that doubles as a gift?! I can think of so many fun ways to use this die idea. Feel free to share yours in the comments!

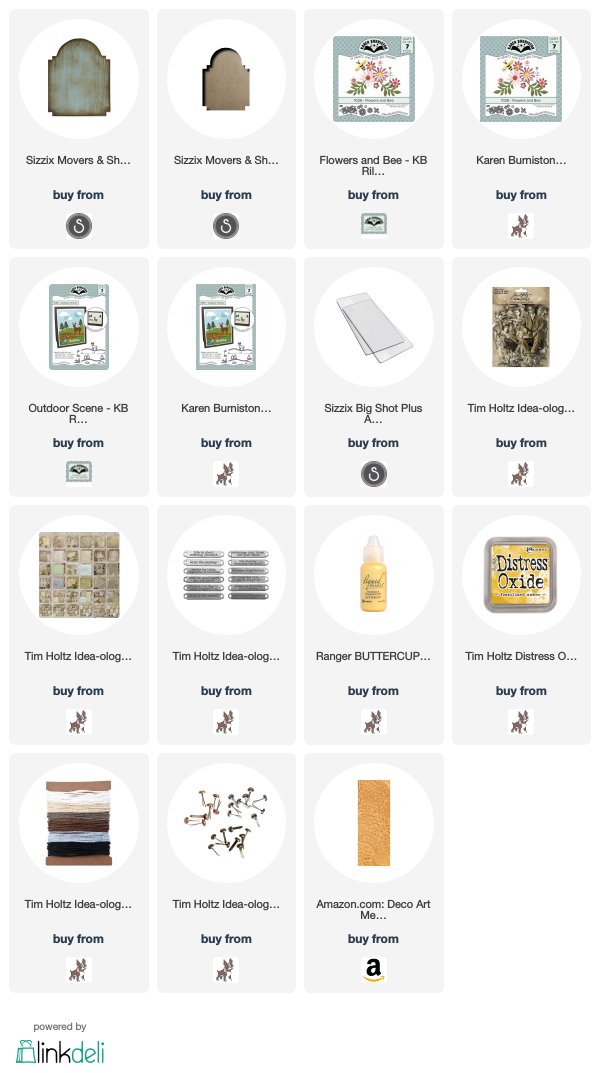
The supplies I used can be found at Sizzix, Karen Burniston, and Simon Says Stamp via the links below. Make sure you check out the other amazing Tim Holtz dies that are on sale at Sizzix this weekend!

Thanks so much


Monday, February 19, 2018

Steampunk Pop Up Cake

Hi everyone! I'm just popping up (!) to share a grungy steampunk birthday card I made using Karen Burniston's new Cake Pop-Up Card die. This card was so much fun to make! I started with a background that was created with Ranger's Distress Oxide inks. The metal looking strips at the top and bottom are kraft cardstock that I painted with Brushed Pewter Distress paint. I die cut the word celebrate out of a scrap of painted cardstock and adhered it to one of the strips, then added rivets that were made with the flower center die from Karen's Flower and Bee die set. I painted over everything with black Distress paint, then wiped it off, giving it an aged appearance.

The cake layer were all created with different techniques. The bottom layer is plain white cardstock that I gave a wood appearance to by drawing lines with a brown marker. I die cut the paper, then added gold rub ons and a coating of glossy accents. The middle layer is more painted cardstock and faux rivets. The top layer was painted with bronze Distress paint and stamped and embossed with a gear stamp. On the top I added a mini gear.

I adhered just the bottom and sides of the metallic strip so that I could insert a stamped tag and a gift card.

On the front, I added another wood-looking panel created from white cardstock and markers. I cut a frame out using one of the square frame dies from Karen's Square Pop Up set, then added a stamped panel behind. The 37 was cut from silver painted cardstock using her new numbers dies.

I made a little series of photos so you can get an idea of how the cake expands when the card is opened. It is SO cool!!

The supplies I used can be purchased via the links below.


I'm sharing this over at the Simon Says Stamp Monday Challenge - Grunge it Up!

Thanks so much for stopping by today - have a great week!

Tuesday, October 31, 2017

Happy Halloween!

Happy Halloween, everyone! Once a month, my friends and I get together for lunch and some creative play time. We also recently started a fun swap, making pages that we store in books we made with Eileen Hull's Journal die.

This month the theme was Halloween, of course! I am still obsessed with Ranger's Distress Oxide inks and decided to use them to create a background for my panel. I used dies from Karen Burniston to create a graveyard scene for my witch to pose in. To make the fence taller, I folded a piece of black cardstock and placed the die on top with the bottom edge just over the fold. When it's cut, the bottom stays intact so that when it's unfolded, you have a double-high fence! I thought the sentiment fit the expression on my witch's face perfectly.

It was my turn to host lunch and I thought it would be fun to have a gothic-themed Halloween party. I blame it on my obsession with Penny Dreadful. I just discovered that show and am in love with it!

One thing that was fun about creating this tablescape is that I had almost everything on hand - it was just a matter of pulling it all together. The flowers are a combination of grocery store bouquets and ferns and weeds from my yard. Note the little framed picture of the witches. I joked that it was the four of us and I was the one on the far right - that's who I used for my card! :)

A little black spray paint gives this terra cotta thrift store find a somber look. The little tealight holder is from Pottery Barn.

I have a bit of an obsession with old, tarnished silver, and I think I used about every piece I owned! For the place settings, I used silver trays as chargers, then layered on plates from the dollar store and Home Goods. I found the little glass and metal cups at Salvation Army and fell in love with them! The milk glass tumblers came from Tuesday Morning, and the napkins are from Michaels.

For some reason, I thought a red velvet cake with red rosette icing was a good idea. What was I thinking?! I have never tried to make a deep red colored icing and may never attempt it again. That's a lot of food coloring! I wanted it to have black edges - kind of a singed look - so I first tried spraying on black coloring mist, which didn't really work at all. I ended up spraying it in a bowl and brushing it on. Kinda worked?

More silver serving pieces piles with treats. I love the weirdness of the Moon Drop grapes - they're perfect for a witchy party!

You can find the supplies I used at Amazon and Simon Says Stamp via the links below. Click the icon for the store you prefer to shop at.


Thanks so much for stopping by today - have a hauntingly happy Halloween and a great week!

Friday, October 27, 2017

Halloween Luminary Easel Card

Hi everyone! Today I'm sharing a card that I've wanted to do for years, but never got around to. It's a luminary easel card. The cutout is covered with vellum and, when you place a battery-operated votive behind it, you get a fantastic, eerie glow through the window!

I just got the new set of Distress Oxide colors and couldn't wait to create some backgrounds with them. This one uses Seedless Preserves, Wild Honey, and Spiced Marmalade.

A flameless votive candle fits perfectly in the opening created by the circle die cut.

My favorite part is the 'stop' I created to hold the card in place. I really wanted to do something clever, like Karen did with her zombie hands in this card. I was thinking how cool it would look if there were rows of tombstones and hit upon the idea of scoring one so that it would lay flat when the card was closed, but could be raised up to hold the card in the open position. And it worked brilliantly! I covered the edge with a piece of ribbon that was dyed with the same colors of Distress Oxides that I used on the card front.

Here is the card in the closed position. The stamps I used are all from Tim Holtz. The dies are all from Karen Burniston.

How cool is that double row of tombstones?! I love the idea of having the easel stop being part of the card design. And how gorgeous are those Distress Oxides? And that glowing moon?! I love it all. I'm going to be so sad when Halloween is over!

You can purchase the products I used at Simon Say Stamp and Amazon via the links below.


Thanks so much for stopping by today. Have a great weekend!

Tuesday, October 3, 2017

Karen Burniston Designer Challenge - G-G-G-Ghost!

Hi all! It's time again for Karen Burniston's Designer Challenge. The theme this month is G-G-G-Ghost! And this card has some very spooky ghosts in store for you...but they're very shy.

I was inspired by my fellow teammate, Fran Sabad's, Phantom of the Opera card from a few weeks ago. I love how she combined the Katherine Label and the circle from the Snowman Twist Circle set to make a rising moon card. I thought a spooky graveyard scene with the moon rising at the card was opened would be perfect for the ghostly theme.

And here are my spooky little apparitions! I thought it would be cool if they weren't just stationary, but rose with the moon as the card was opened, floating out from behind the tombstones. I figured out an easy way to make it happen and it really takes the card to a whole new level!

One thing I've really been wanting to try is the new Distress Oxides on black cardstock. I thought it might make a really eerie night sky for my witch to fly across and I was right! I took a few pics while I was making my card to show you how I created it.

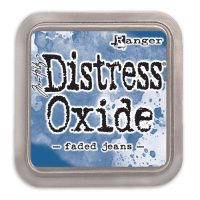
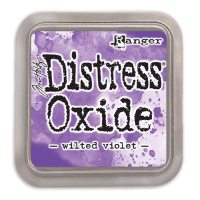
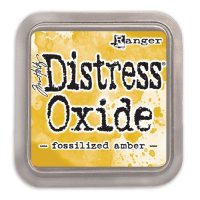
I started by pressing Faded Jeans, Wilted Violet, and Fossilized Amber Distress Oxide inks onto a non-stick craft sheet as shown, then spritzing them with water.

I dragged black cardstock through the ink and dried it. Then pressed it into the droplets to pick up more ink and dried it again. How lucky was it that the Fossilized Amber ended up right where my moon would be? Cool! I wanted to add a bit more depth so a wiped my sheet clean and pressed just the Faded Jeans and Wilted Violet into the sheet - this time I spritzed with Perfect Pearls mist to see what kind of effect I would get.

 Ooooooh. Pretty good effect, right?? I love how this turned out!

So the mechanism would match the card, I inked up a scrap of cardstock and then die cut the mechanism and assembled it. To get my ghosts to dangle, I cut a small slit in the bottom of the mechanism and threaded a thin piece of clear acetate through, securing with tape. After fiddling with the placement, I adhered a ghost to the strip, adding another ghost to his arm with glue.

The moon was created by cutting watercolor paper with the large circle from the Snowman Twist Circle set, then pressing it into a nonstick craft sheet that's been inked with Antique Linen and Pumice Stone Distress inks. The witch is a Tim Holtz stamp that was stamped in black and fussy cut. The tombstone strip is popped out in the center with foam dots, then adhered to the card on the edges with double-sided tape.

How gorgeous is that spooky night sky?! And how adorable are those little ghosts peeking out from behind the tombstones? I wish you could see it in motion - it's so fun to see those ghosts popping up! I will probably post a video on my Instagram, so be sure and follow if you'd like to see it.

You can find all the supplies I used at Simon Says Stamp via the links below.


Thanks so much for stopping by today! I hope you enjoyed my take on the challenge and my Distress Oxides tutorial. I had a blast making this card! Be sure and check out Karen's blog tomorrow for an amazing card tutorial and lots of G-G-G-Ghostly inspiration from the team.

I'm entering this into the following challenges:
Simon Say Stamp Monday Challenge - A Walk on the Dark Side
Frilly and Funky Challenge - Show Us Your Stamps