Hi all! Hope you're having a relaxing weekend. The beginning of this month marked an important occasion -
Karen Burniston's new Journey collection from Sizzix is now available in stores! On top of that, there is a new issue of the
Technique Junkie newsletter available. I decided to combine one of favorite techniques from the issue with some of Karen's dies to create a fun travel journal-style card for my brother's birthday.
How adorable is that suitcase? When I first got this companion Bigz die, I immediately thought it needed to open and have something tucked inside. I wanted to be able to insert a gift card, but the suitcase is just a bit too small. After bugging Karen for ideas, she suggested this...
A little sleeve that nests inside the suitcase! I tried to make it so it would blend in with the outer part of the suitcase - it adds a nice little border behind the front flap and doesn't look out of place at all. To make the gift card easy to access, I added a piece of idea-ology Tissue Tape, creating a pull for the card. It's easily removed by the recipient.
Here's a quick tutorial in case you'd like to make one of your own!
Begin by cutting a card from kraft cardstock using the Pop 'n Cuts Base with the Suitcase insert. Following the instructions for the Stained Embossing technique, create a panel for the front using the Compass Texture Fade. (Note - the Technique Junkie Newsletter is a paid subscription and I highly recommend it!)
Next, cut a 7" x 3 1/2" piece of green Kraft Core'dinations paper. Fold in half. Emboss one half of the paper using Tim Holtz' Airmail Texture Fade.
With the embossed paper folded, place over the suitcase outline, moving the folded edge up about 1/16", so that the fold will stay intact after cutting. Cut suitcase and set aside. Using the same die, cut corners from kraft cardstock, the tag and buckle from chipboard, and the strap from Grungepaper.
To create the inner sleeve for the gift card, cut a piece of kraft cardstock 4 3/4" x 3 3/8". Score at 2 1/2" and at 1/4". Stamp the front as desired and round the top corners. Apply Scor-Tape to the bottom flap, fold, and adhere. Cut an inch of Tissue Tape. Apply one end to the front of your gift card. Fold the tape in half, pressing the other end on the other side of the card, creating a tab. Insert into sleeve.
Apply adhesive to the back of the sleeve adhere to the inside of the die cut suitcase. Paint the buckle with silver paint. Color the Grungepaper pieces with brown ink, add stitch lines with a pen and adhere to front of suitcase. Use rub-ons to add a sentiment to the tag and tie suitcase closed with a length of idea-ology Paper String.
I also decided the inside of my card needed some contrast, so I painted it using a Black Soot Distress paint dabber. After that was dry, I carefully embossed it with the Harlequin Texture Fade (not shown). To finish the inside of the card, adhere the folded suitcase to the pop-up mechanism. Cut a tag from manila cardstock using the Sizzix Tiny Tabs and Tags die. Stamp with sentiment and adhere to bottom of card.
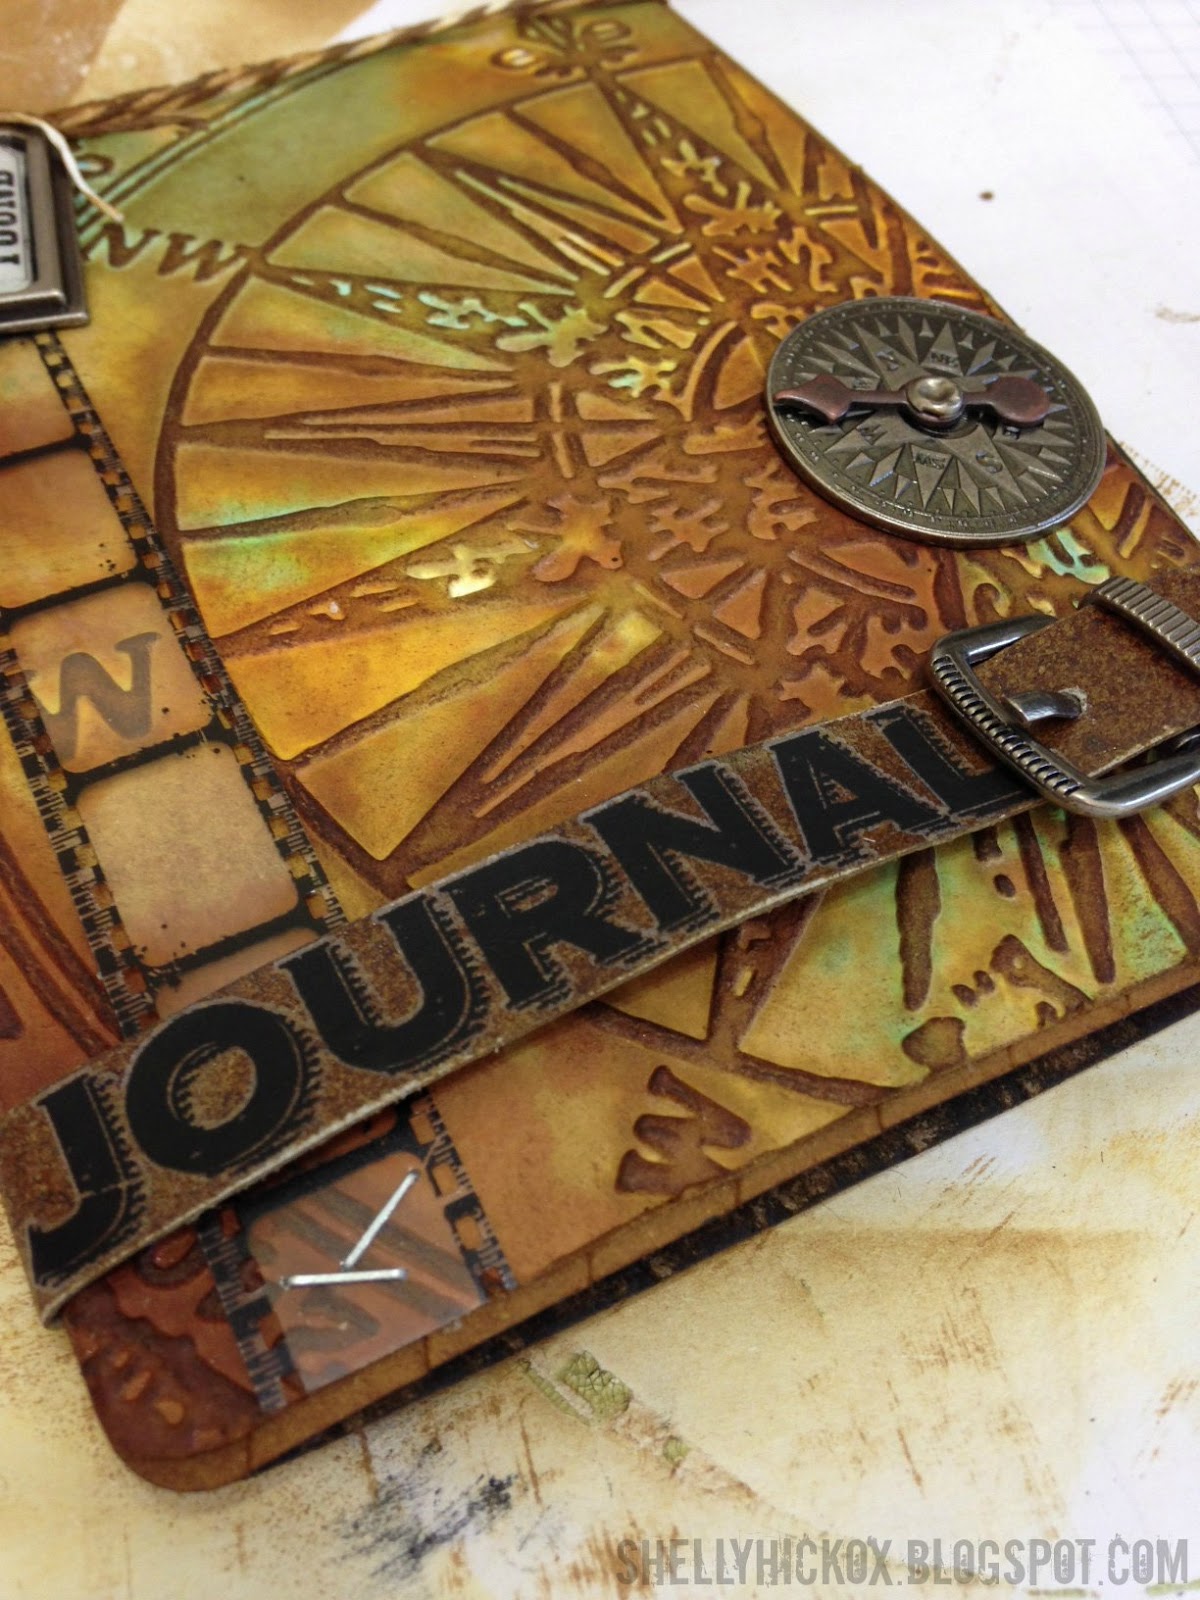
To finish the front, cover the pop-up opening with kraft cardstock. Adhere the stained, embossed piece to the front. Embellish with a length of Film Ribbon and one of Tim's new Compass Coins. Create a belt to hold the card closed by cutting a length of Grungepaper, inking it with brown ink, and covering with a light coat of Glossy Accents. Attach an idea-ology Buckle to one end, wrap around card, punch a hole where needed and fasten. Add a word rub-on from the idea-ology Words Remnant Rubs.
I first saw Grungepaper used with Tim's Buckles on
this fantastic piece by Tammy Tutterow. I think this is such a brilliant idea and I wanted to make sure to give her credit for inspiring me to use the buckles in this way. I absolutely love how it looks on this card!
I think this would make a perfect Father's Day or Graduation gift as well as a cool birthday card. Such a fun die! I love how the suitcase opens to reveal the gift. Instead of tying with string, you could experiment with using magnets or a decorative clip.
I love these dies so much, I thought it would be nice to share a set with one of my lucky readers! All you have to do is leave a comment by next Sunday, June 16. PLEASE be sure and include your email contact if you're leaving an anonymous comment. If you win and I can't get ahold of you, that would be sad! I'll announce the winner on Monday, the 17th. Good luck!
THIS GIVEAWAY HAS ENDED. THANKS SO MUCH FOR YOUR COMMENTS!
All of the supplies I used for my card can be found at Inspiration Emporium via the links below. When you use my coupon code - stamptramp - you'll save 10%
InLinkz.com
I also wanted to mention a fun giveaway that Sizzix is sponsoring, called '
Pin-it-to-win-it'. The prize is a sampling of Karen's new collection plus a $100 Sizzix gift card. WOW!! You can read all about it
here. Good luck with that one too - even though I already own the dies, I would still love to win! :)