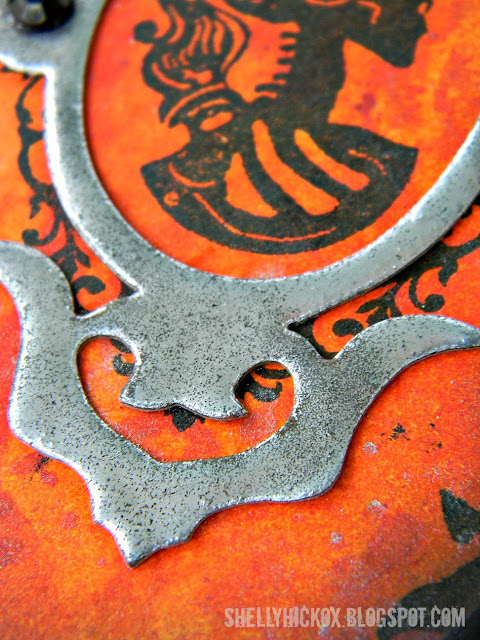
Another commenter said that it looked great on detailed frames, and I totally agree. I just got this Sizzix Fancy Frame die from Karen Burniston yesterday and it seemed like I was fated to try this experiment, even though I was supposed to be working on getting my studio organized. Oh, the sacrifices I make for my art! ;-)
As you can see, the frame is perfect and the regular ep (vs. UTEE) works really well! It's definitely a more subtle look, but I love it...almost more than the original. I started by applying two coats of Ranger silver embossing powder to the chipboard frame. I heated sections of the frame I wanted to 'tarnish' and then sprinkled little pinches of Ranger's clear embossing powder onto the hot surface, where it melted immediately.
The background of this piece was a tag that I'd been experimenting with Distress Stains on. I used Wild Honey, Barn Door, Spiced Marmalade, and the new Tarnished Brass Metallic Stain. Love that stuff! Remember the oval wood shape I used on my little Halloween house? I used another oval for this little hanging. I adhered the tag to it using Ranger's Glue 'n Seal and colored the edges with a Pitch Black Dabber.
I couldn't believe how perfectly the pretty skeleton lady from Artistic Outpost's Gothic 31 stamp set fit into Karen's frame! I love when things work out like that. I stamped her in the center of the plaque and then adhered the frame on top. I added the stamped vines around the edge to frame it.
Finally, I used idea-ology Screw Eyes to dangle a Bauble from the bottom and Black Soot-dyed Crinkle Ribbon from the top.
This was such a fun little project to whip up! I love trying something new - it's all about learning and growing, right? There are no mistakes, which is why I always encourage people to try their ideas and put their own spin on things.
The supplies I used can be purchased from Inspiration Emporium via the links below. Remember, if you use my coupon code - stamptramp - you'll save 10%!!
I also wanted to remind you that there is still time to enter Inspiration Emporium's October challenge. It's all about Spooktacular Decorations and you could win a $50 shopping spree to the store!! You can check out all the details here. I hope you join us!


Awesome, Shelly! Love that frame!! I caught your tutorial yesterday and can't wait to try it. Thanks for sharing it :)
ReplyDeleteThis is super! Love that skeleton lady as well! She is cool! Need to check out yesterdays tutorial now! Hugs, Sandra
ReplyDeleteCool techniques... another one to add to my list ! Thanks for the reminder, I keep saying I'll get to it but "Life" keeps gettin' in the way :) !
ReplyDeleteOh I like this-and I have everything I need to give it a try.You have certainly inspired me this Halloween-thank you!
ReplyDeleteI love that orange background! hmmmmmm, mmmmmmm :) That tech has long been one of my fave's, but that little lady is perfect for it!
ReplyDeleteAwesome Shelly
ReplyDeleteLove the technique and the frame very much.
Greetings Janny
You're good...but I think you should know that by now! ;-)
ReplyDeleteFabulous ornament! I certainly appreciate the technique, looking forward to trying this out for one of the upcoming holidays. Adore all of the pieces you have put up for Inspiration Emporium and have just signed on as a follower...
ReplyDelete