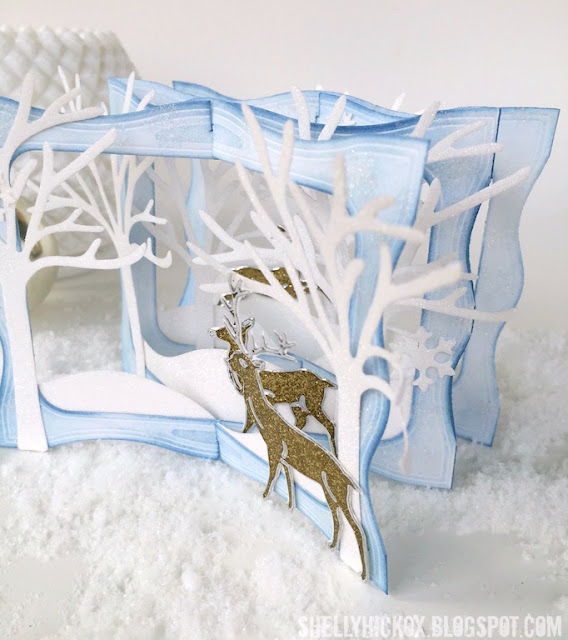
Hi all! Today I'm sharing a tutorial for this pretty winter card that I made using Karen Burniston's new Gift Card Accordion die. As you know, I love using the accordion dies to make tunnel cards - it's a great way to get extra mileage from your dies! I've had the idea for this snowy woodland scene in my mind for ages. I just knew that Karen's All Seasons Tree die was going to look gorgeous covered with Elizabeth Craft Designs' Warm Diamond Glitter. So sparkly!
The tunnel cards are such showstoppers. They lay completely flat for mailing, but expand into an amazing diorama. I can't imagine anyone who wouldn't be thrilled to receive a card like this. And even though it looks complicated, it's incredibly easy to make. Here's how it goes together:
1. Begin by cutting a piece of 100 lb Soft Finish cardstock in half
lengthwise, creating two 4.25" x 11" panels. Fold each panel in half.
Place the folded panel on the Gift Card Accordion die, making sure you
drop the folded edge below the cutting line on the die, so that the fold
stays intact (you may want to tape it to hold it in place). Run the die
and paper through your machine to cut. Repeat for other card. Cut out
the center panels and cut off the tabs. Next, cut notches into the outer
frame of one panel, and into the inner edges of the other, as shown.
2. Use a sponge or inking tool to lightly color the panels on both sides.
3. To give the card a bit more shimmer, stamp the two small snowflake dies from Karen Burniston's Merry & Bright stamp set onto the card using embossing ink. Cover with sticky embossing powder and heat. Immediately cover with Warm Diamond glitter. Let cool and tap off excess. Assemble the card. For a more detailed tutorial, see my original post.
4. Cover a sheet of white cardstock with double sided adhesive and die cut seven trees, being sure to cut with the release paper side up. Remove the release paper from the trees and cover with Warm Diamond glitter. Polish the glitter with your finger to completely adhere and bring out the sparkle.
5. To create the snowbanks, cover another piece of cardstock with double sided adhesive and cut several pieces using the wavy die from the Outdoor Edges set. Cut to fit the area of the card you're decorating. Remove the backing paper and cover with Warm Diamond glitter. Tip - for an easy way to adhere the panels, cover the outer edges with a bit of release paper before you apply glitter. Remove the release paper and stick onto your card.
6. To make the stickers usable for the card, adhere them to cardstock and then trim carefully with detail scissors.
Once all your elements are glittered and cut out, it's just a matter of adhering them to the card. I love the way the ECD Glitter Stickers look in this scene - so gorgeous!
The supplies I used can be found at Elizabeth Craft Designs and Simon Says Stamp via the links below.
Thanks so much for stopping by today! If you'd like to see more of my tunnel cards, click HERE to see my previous posts. Trust me, once you try one, you'll be addicted!


w, Shelly that is so serene and so beautiful!
ReplyDeleteSuch a beautiful card and great tutorial!
ReplyDeleteFANTABULOUS!!!! I love this Shelly and that new accordion gift card die is cool! The outer shape is so decorative.
ReplyDeleteSo fantastic once again! Hugs, Rita
ReplyDeleteI love the design thanks for the tutorial
ReplyDeletewonderful
ReplyDelete