Hi all! I have such a fun project to share with you today. It's an Artist Trading Block birthday cake! I've had this idea for awhile...my original thought was for it to be a wedding cake, but when I realized my daughter's birthday was next week I was like - perfect!
Here's how I put it together:
Cover six 12" x 6" pieces of medium weight chipboard with paper (I use Elmer's Spray Adhesive and I love it!). Cut two box pieces using Eileen Hull's 3D Block die, cut four more using her 3D Cubes die. Cut one Cupcake Stand from chipboard. (Ignore the bells - I didn't end up using them!)
Assemble the boxes and set aside.
Paint the cupcake stand with gold paint. When dry, assemble and cover with Ranger's Platinum Dry Stickles glitter.
The top block is decorated with an idea-ology Curio Knob, lace trim, one of the key holes from the Locket Keys set, and a paper flower. I also use a Picket Fence Distress dabber to lighten the edges and corners.
On the middle block, I added an idea-ology Plaquette (my daughter will be turning 25, perfect!) that was tied with Crinkle Ribbon that I dyed using Spun Sugar Distress Stain. On the top I added some trim that I found at the Target Dollar Spot. Along the bottom I added adhesive pearl trim.
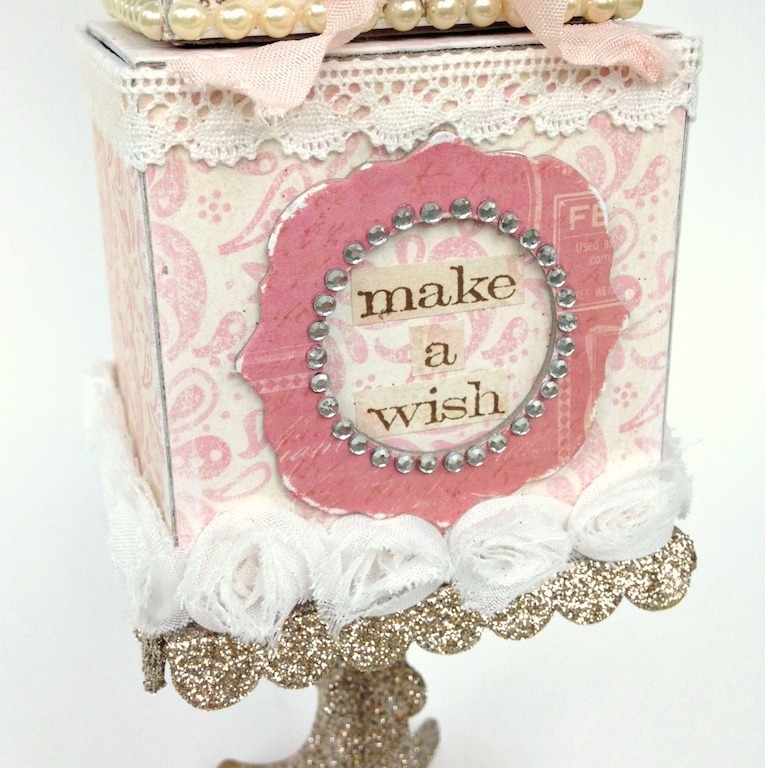
Before I decorated the bottom block, I adhered to the cupcake stand. When it was dry, I added fabric rose trim (from Tim Holtz, discontinued) on the bottom, and lace trim on the top. The frame was cut from paper covered chipboard using Eileen's Decorative Frame die. I added tiny rhinestones and a sentiment stamp from Tim Holtz's Simple Sayings stamp set.
I am so excited to send this to my daughter! I glued the bottom two boxes shut and left the top one open to add her gift. If you wanted to though, you could probably leave them all open and fill the whole thing with pressies! I think this would be beautiful for a wedding gift as well. I'm sure the bride and groom would treasure it.
The supplies I used can be found via the links below at Inspiration Emporium, Sizzix, and Amazon. When you use my coupon code - stamptramp - at IE, you'll save 10% on your order!
You still have a few days to enter Eileen's Art With Heart challenge. You can read all about it and post your submissions
HERE. I hope you can join us!
Thanks so much for stopping by today - have a fantastic week!


Fabulous Shelly, love the stand and classy papers and your touch of glitter. A wonderful gift. Tracy x
ReplyDeleteSo so beautiful, it is just such a clever idea. I love the vintagey girly, pretty combo of embellies and papers and the execution is perfection. Cannot say how much I Luuurve this :)
ReplyDeleteAmazing as always
ReplyDeleteLove this Shelly. Such a clever idea beautifully executed. I bet she'll be thrilled to receive it. Jenny x
ReplyDeleteOh wow Shelly, adore this, such a great way to use those blocks!!! Bet your daughter is going to adore this!!
ReplyDeleteSo pretty! You could do this with a lot of different themes.
ReplyDeleteMEGA fabulous!!!!
ReplyDeleteYou did a fantastic job on these boxes. Such a versitile idea, I can just see it with a vintage Halloween theme. You continue to amaze me with your cool ideas.
ReplyDeleteThis is so pretty ... so you !! :)
ReplyDelete