Hi all! Today I'm sharing a tutorial for this sweet little sleigh ornament created with Karen Burniston's Sleigh Gift Card Holder Pop Up die. The die is meant to create a pop-up card with the sleigh inside holding a gift card, but I just knew it would also make the cutest ornament! Here's how I did it:
Die cut two sleighs from silver glitter paper using the large base sleigh. Adhere a sheet of Elizabeth Craft Designs adhesive to the back of another piece of glitter paper. Cut two more sleighs, but make the cuts from the back side, creating a mirror image.
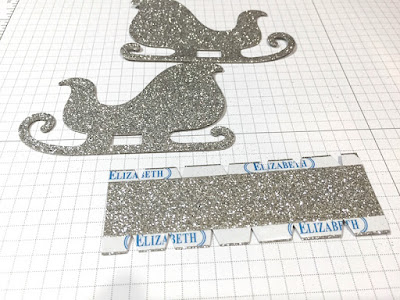
Remove the release paper and adhere the glitter sleighs, creating two sleighs with glitter on each side. Next, cut a piece of glitter paper measuring 4.5" x 1.5". Score 1/4" from the edge on either side and adhere a strip of Elizabeth Craft Designs adhesive tape. Cut tabs as shown.
Fold up tabs, remove release paper, and adhere one side of strip to one sleigh. Repeat with the other piece. You now have a 3D sleigh!
Now we can decorate! Cut two of the decorative layers of the sleigh from Velvet Adhesive Paper, again reversing the paper on the second cut to create a mirror image. Emboss the die cuts using Karen Burniston's Damask Embossing Folder. Note - it's better to emboss after you cut. The texture gets flattened a bit if you emboss first.
To finish your ornament, adhere the embossed velvet paper to either side of the sleigh. Die cut the Noel and snowflakes from adhesive-backed paper and adhere as shown. Die cut several Berry Branches and glue inside the sleigh. Add a tree, die cut gifts, a ribbon, and your ornament is complete!
So, is that not the sweetest thing ever?! I do an ornament swap with a few close friends every year and this one just went to the top of the list of ideas - now I just need to make three more!
The dies, paper, and adhesive I used can be found at Elizabeth Craft Designs via the links below. Everything else can be found at Simon Says Stamp.
Thanks so much for stopping by today - have a great week!


Beautiful project and a great tutorial.Thank you
ReplyDeleteElaine H X
SO SO GORGEOUS!
ReplyDelete