

Hi all! I'm SO excited to share a new challenge blog with you. It's called The Mixed Media Monthly Challenge and I was thrilled to be invited to be their first guest artist. Each month they'll have a different theme and a prize for one lucky participant. This month our own Inspiration Emporium is the sponsor, so I hope you'll join in!
The theme for this month's challenge was spray inks. I decided to experiment with a resist technique - dry embossing and then heat embossing the raised area. I absolutely love how my piece turned out and shot a quick tutorial to show you how I did it.

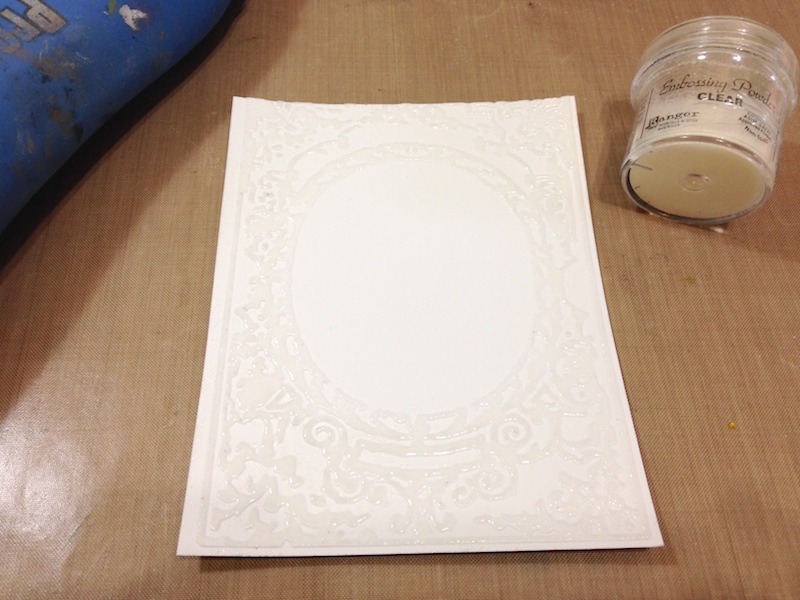
Next, cover inked design with clear embossing powder and heat to melt powder. If you have any stray powder, brush away prior to embossing.

Mist paper with desired colors. Since I wanted a more muted palette for this piece, I chose to dilute my Adirondack color washes to more of a pastel hue. Dab with a paper towel to remove ink from embossed area and let dry. If the color is not intense enough, continue to spritz until you like it.

Here is the embossed piece after it's dry. How cool is that resist?!

I felt like the embossing was just too shiny, so I covered the panel with paper and used a hot iron to melt and remove the ink - just like you'd do for the faux batik technique. It also flattened the embossing just a bit, which I really loved!

As always, you can find most of the supplies I used at Inspiration Emporium via the links below. Be sure to use my coupon code - stamptramp - to save 10% on your order! I also have links to Sizzix for the embossing folders and Amazon for the chipboard. Please note that the discount will not work on these sites.


Thanks so much for stopping by today - have a great week!
This is so pretty! I love that embossed frame, the burlap and the pretty florals! Thanks for the tutorial, love learning new techniques!
ReplyDeleteBeautiful burlap panel. Thanks for the tutorial! Love all the techniques you used!
ReplyDeleteBeautiful Shelly!!
ReplyDeleteThank you, Shelly for being our first guest designer! your project is stunning! I love seeing the step by step photos. gorgeous piece :)
ReplyDelete-Rachel
rwkrafts.com
Just lovely, as always, Shelly! I do like the muted colors, too. (Would brayering the embossing ink on the "business side" of the embossing folder work, too?)
ReplyDeleteGorgeous piece! Thanks so much for sharing the details!
ReplyDeleteBeautiful! Thanks for shaing the details and the challenge blog.
ReplyDeleteVery cool - fabulous techniques and I LUV the finished creation :-D Thank you for the mini TuT :-)
ReplyDeleteHugz
IKE xx
My Challenge Blog
My Shop
My Blog
Very pretty panel.
ReplyDeleteLove the PRETTY colors in this... also love doing this technique too... very sweet Shelly... love it all... Love, Light and Peace...Bonnie
ReplyDeleteGreat project Shelley! Love the colorful resist and burlap was a perfect touch.
ReplyDeleteI love how simple the technique is, yet how elaborate and beautiful the results!
ReplyDeleteBeautiful, love those colors and that sentiment is great !
ReplyDelete