Hi all! I have been having a lot of fun in the studio lately playing with some new products and I have a very cool project to share with you! A couple of months ago, Els from Elizabeth Craft Designs was kind enough to send me a set of her new jewelry dies. Of course, my first thought was, 'what can I cut with these?!' They are wafer thin dies, but I really wanted to see if they would cut aluminum flashing. I was shocked when they cut it like it was butter! I set the dog tags aside and got distracted with something else (typical). Last week Wendy Vecchi sent me a selection of her embossing powders (it was like Christmas!) and a little light bulb went off.
My first experiment yielded a cool necklace (which I'll post soon). After that, I was inspired to try combining techniques and came up with what you see above. I have fallen madly in love with Tim Holtz's embossed texture paste technique from his March tag and thought it would be fun to try over the enameling. I wanted it to look like raised lettering with a rusty enamel surface behind it. Here's how it did it:
Begin by cutting a dog tag from aluminum flashing (I got mine from Lowe's) using the largest dog tag die. Cover it with embossing ink.
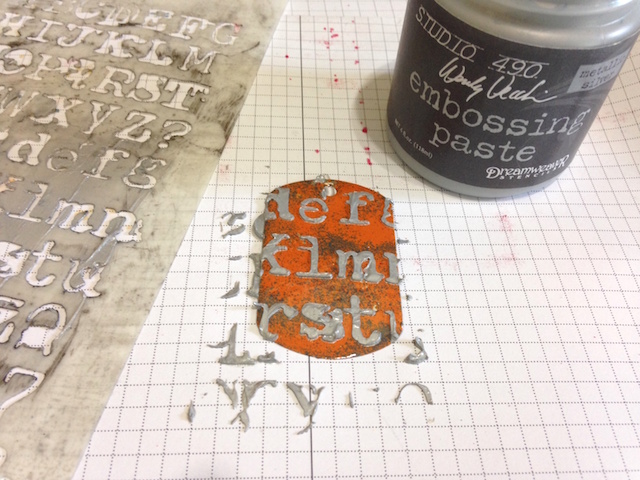
Next, sprinkle Wendy Vecchi's Orange Blossom embossing powder over the tag, making sure to leave a few areas open. Add random sprinkles of Watering Can embossing powder over the tag. Tap off excess and use a heat gun to melt the powders. Make sure you're working on a non-stick craft sheet and be careful - the metal gets very hot! Let tag cool before proceeding to the next step.
Using
Tim Holtz's embossed texture paste technique, apply Wendy's silver embossing paste over the top of the embossed tag.
While the paste is still wet, cover with silver embossing power. Tap off excess and allow paste to dry completely.
When paste is try, heat to melt the embossing powder. SO cool! Adhere gears to the tag using Tiny Fasteners. After I'd added the gears, I decided I wanted a little more texture, so I reheated the tag and sprinkled Vintage Photo Distress embossing powder in random spots. I love how grungy it looks after adding it.
To create a necklace, add a jump ring and ball chain and you're set! If you want to give the back a finished look, you can add another layer of flashing, or a piece of cardstock or felt. I left mine as is because I'm a bit lazy. ;) If you didn't want to wear this, you could use it on a card, in a mixed media piece...pretty much anywhere!
How cool is that embossing powder? I've been intrigued by torch enameling lately and think this gives a similar look, but is much easier. I can't wait to experiment even more!
The dies I used can be found at Elizabeth Craft Designs. The Dog Tag set is only $8.75 and you get three sizes of dies - I think that's an incredible deal! The rest of the products can be found at Simon Says Stamp. I also added a link to flashing on Amazon in case you can't find it at your local hardware store. It's quite inexpensive for the amount you get. You'll never run out of that stuff!
Thanks so much for stopping by today - have a great week!


This is absolutely a wonderful tag, Shelly. Thanks for the inspiration
ReplyDeletean sharing how you made it.
Looks amazing Shelly.
ReplyDeleteSmiles:)
Sue
oh man, that is SOOOOOO cool looking!!! i LOVE it!! grungy goodness!
ReplyDeleteNow I know what to do with those thousands of blank dog tags I bought(seriously). I am so trying this tomorrow.
ReplyDeleteFabulous idea Shelly! Such an amazing way to use embossing powders, love the rusted effect! :)
ReplyDeleteBeing a military wife, I LOVE this!! Excellent idea for a table embellishment at a promotional ceremony. Wonderful textures and design too Shelly!
ReplyDeleteWhat a great technique, thanks so much for this great tutorial Shelly!
ReplyDelete